Tutorial Upcycle – Embroidery
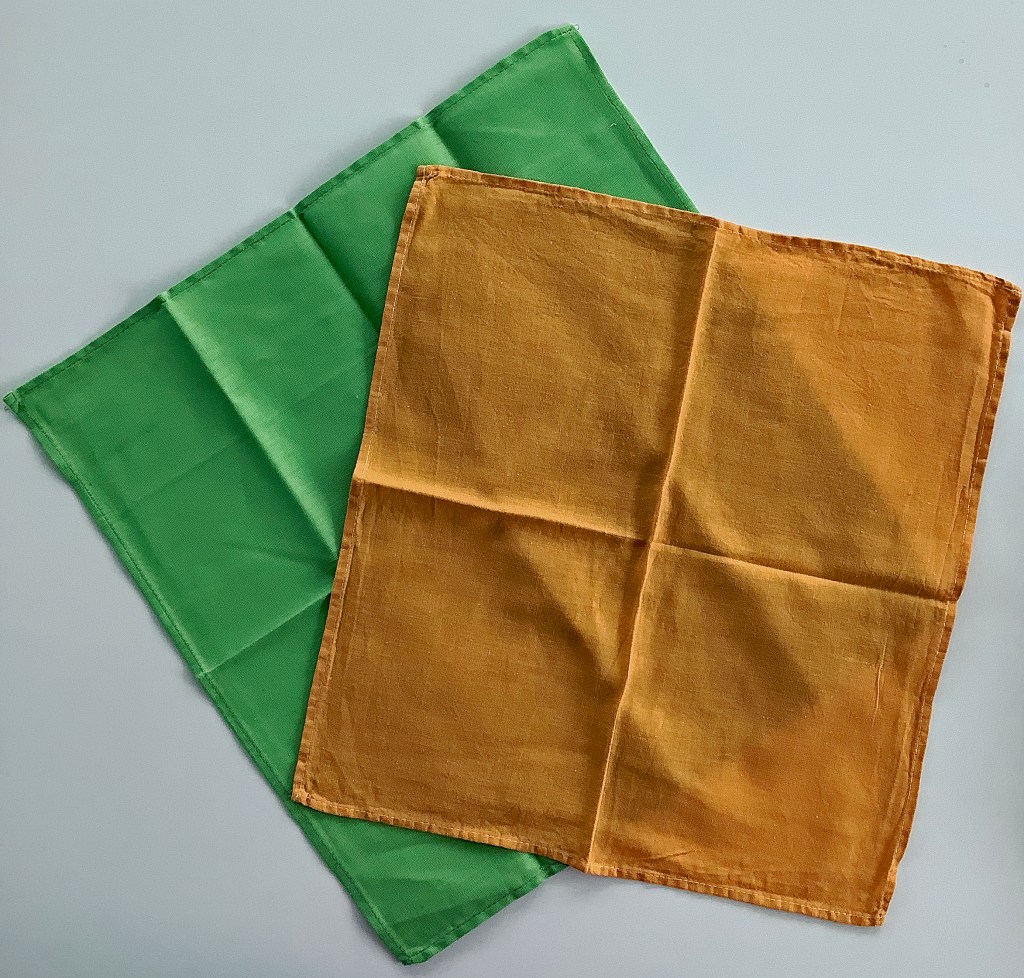
I inherited a delightful collection of linen napkins and tablecloths. While the tablecloths present a bit of a challenge, the napkins, with their smaller size and simplicity, are perfect for crafting everyday items.
5. To start, I cut an orange linen napkin. The edge that goes into the Click Clack must match the size of the clasp. The bottom can be slightly wider, but I opted for a regular rectangle shape.
My Click Clack clasp measures 12 cm, so I cut the napkin into a rectangle measuring 25 cm by 14 cm, allowing for sewing margins.
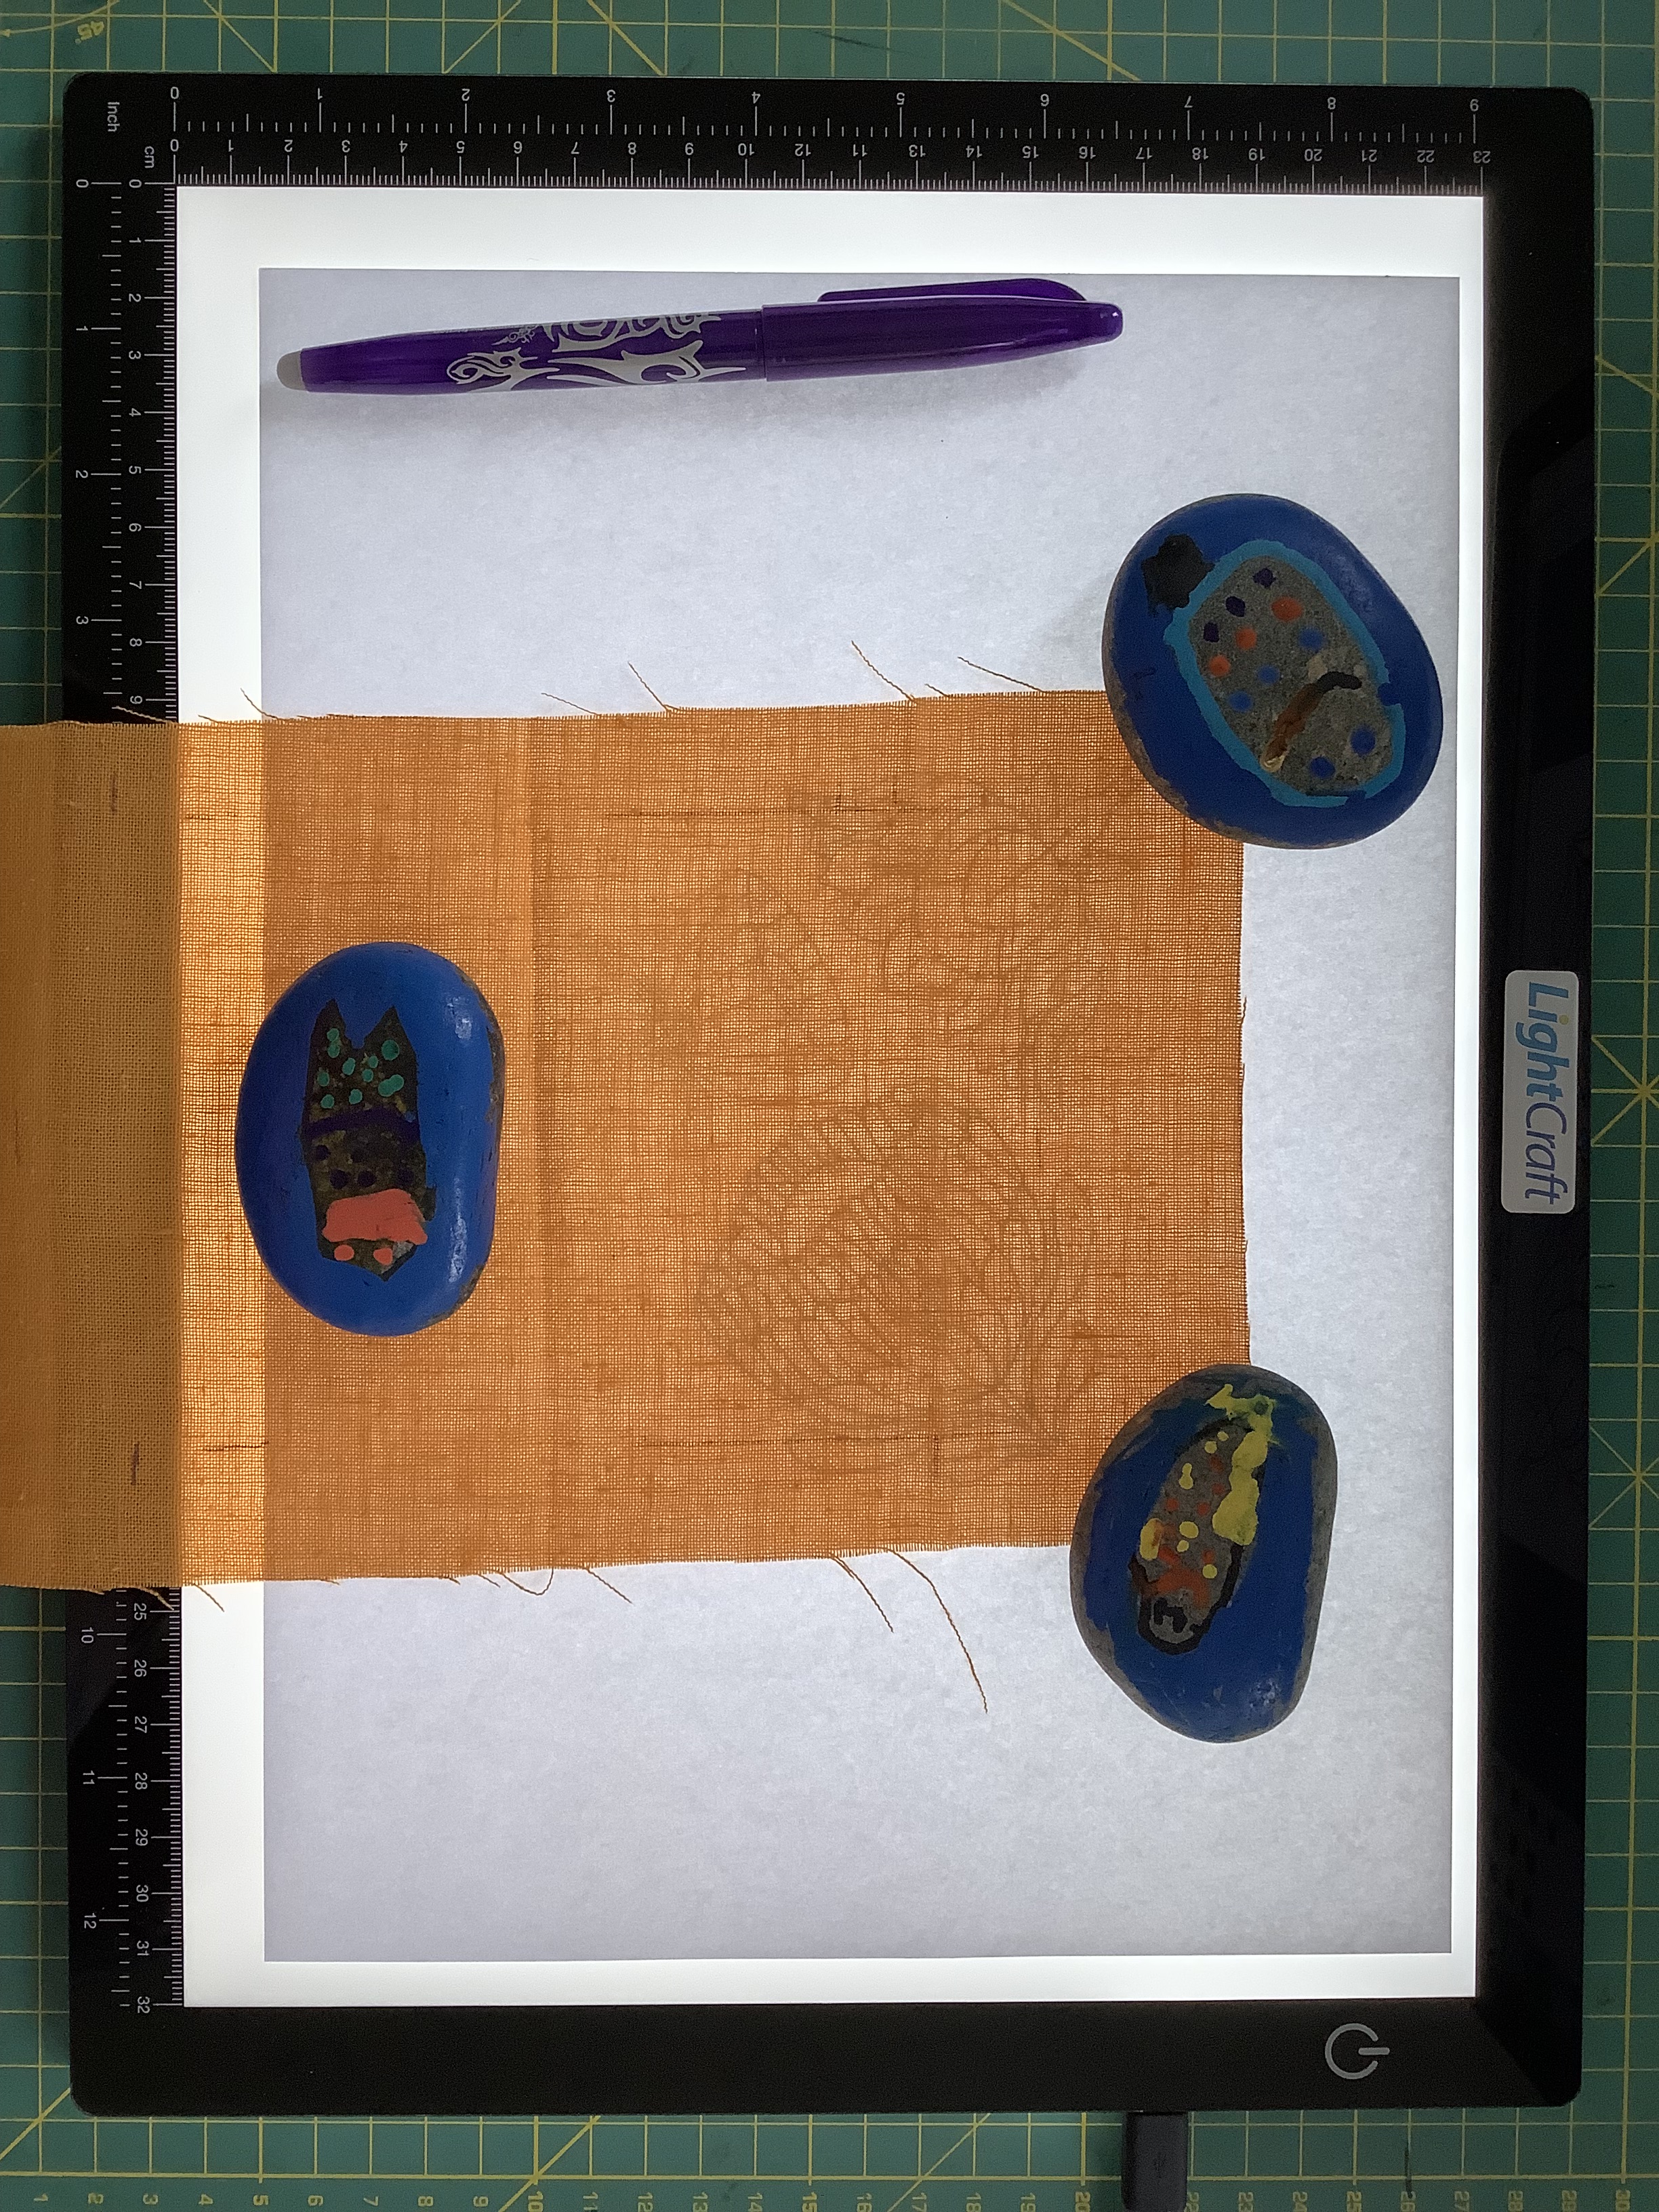
To design the flowers, I used Procreate to sketch them and printed the designs on A4 paper, ensuring they fit within the 25×14 cm rectangle. After adjusting the flower designs to the right size, I had to transfer them to the fabric.
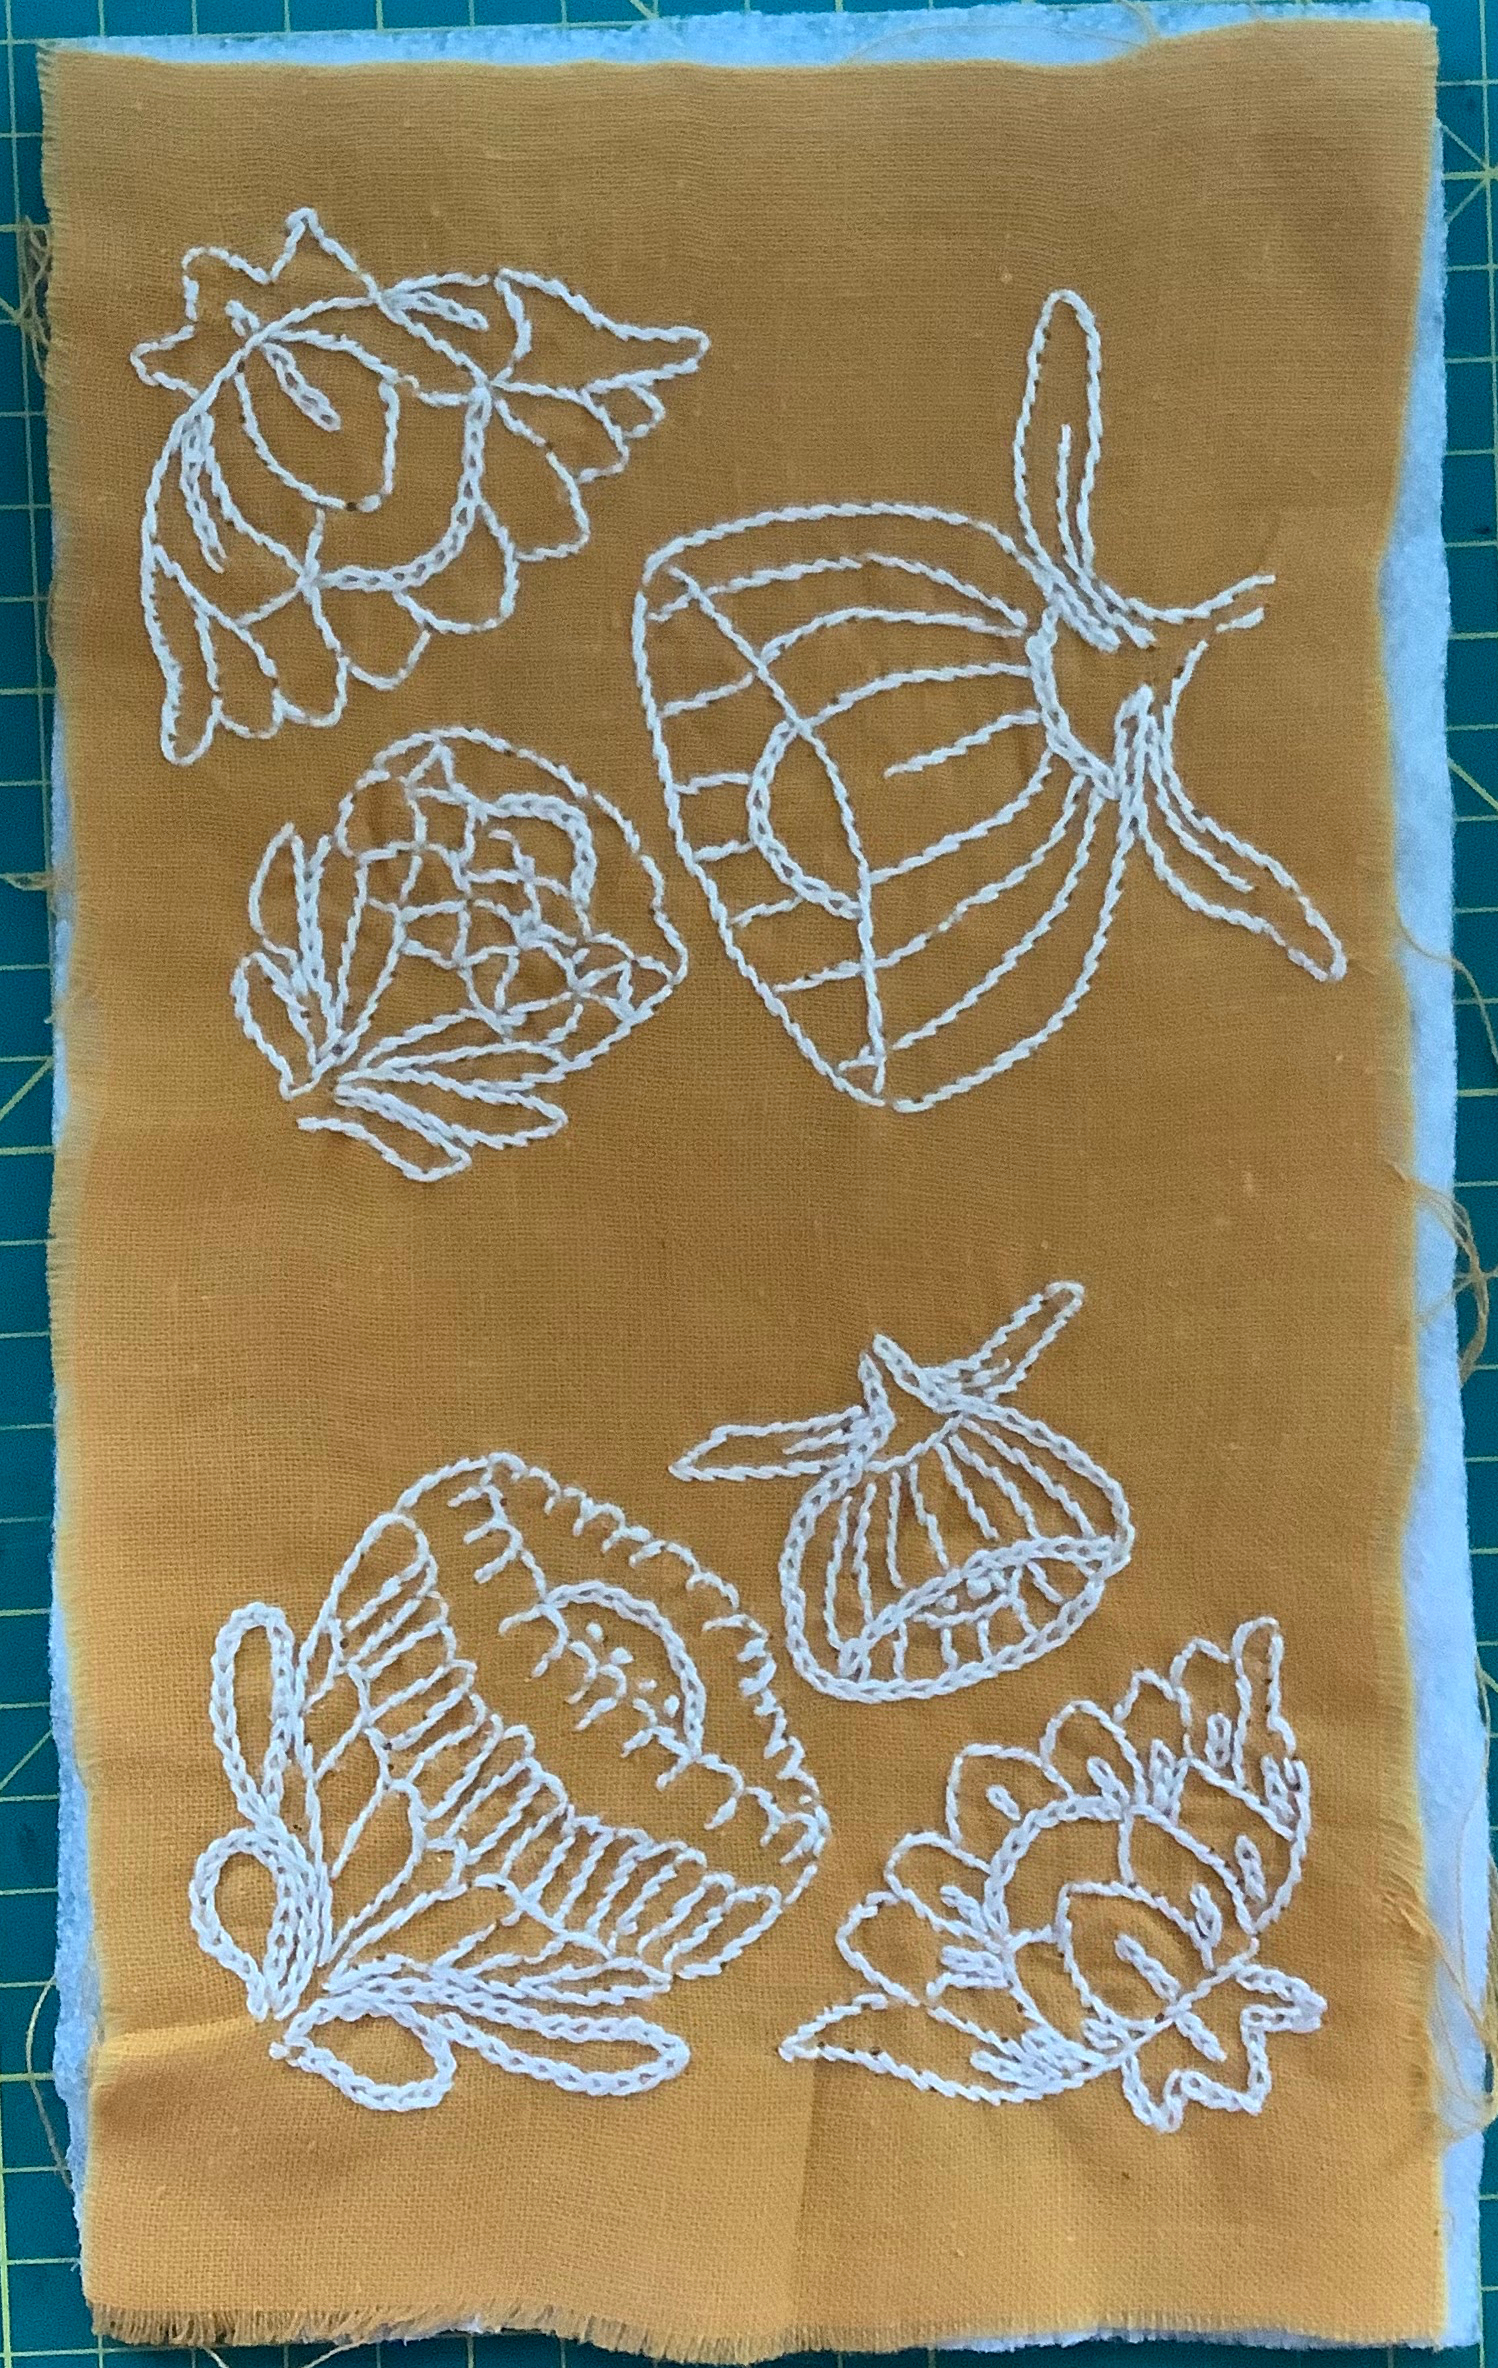
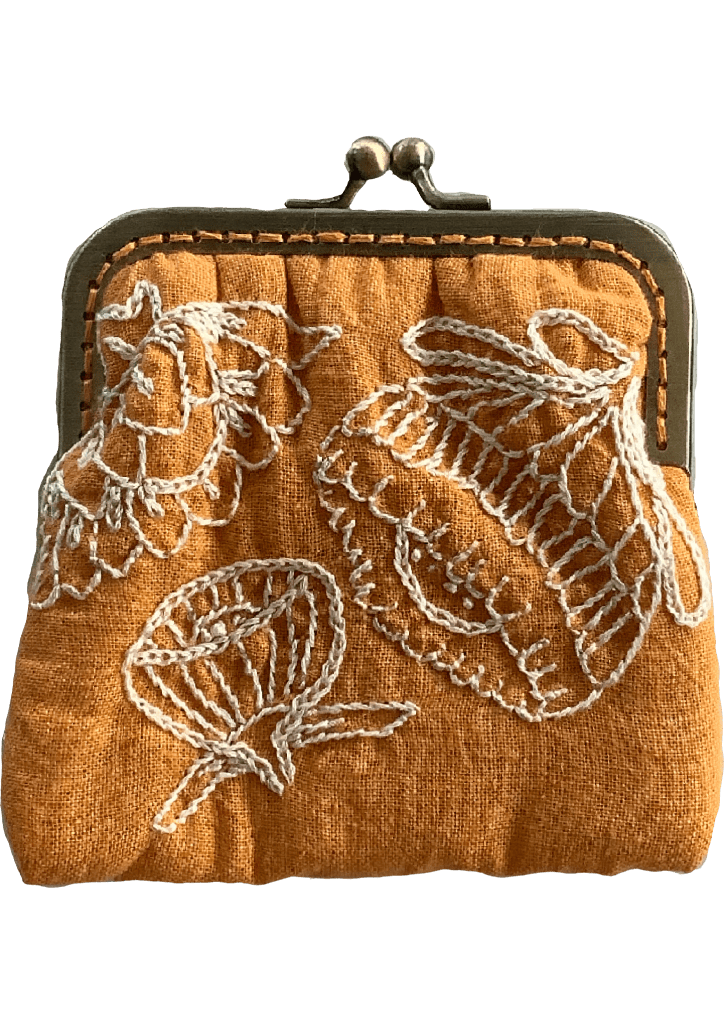
8. After completing the embroidery, I cut a piece of padded Vlieseline to size and ironed it onto the back of the fabric, using parchment paper to protect the iron. It’s important to always iron from the back of the fabric to avoid damaging the embroidery.
2. My first project with these linen napkins was a quilt featuring intricate red designs, inspired by the traditional art of Redwork. Redwork became all the rage towards the end of the 19th century, thanks to the advent of colorfast red thread, which was used to create easy and affordable embroidery patterns. Today, you can still find many examples of this red-thread embroidery.

3. For my quilt, I decided to embroider scenes from my daily life and the objects around me. To bring it all together, I hand-quilted each piece, a skill I honed during an online course with Heidi Parks, during the pandemic. The process was a labor of love, transforming those inherited napkins into a cherished keepsake.
I was thrilled with my quilt, though less so with the quilting process. Quilting by hand demanded a lot of time and effort, requiring weights to keep the fabric firm and flat on the table. Unlike embroidery, which I enjoy lounging on the sofa with an audiobook, quilting required sitting upright in a chair, limiting my working time.
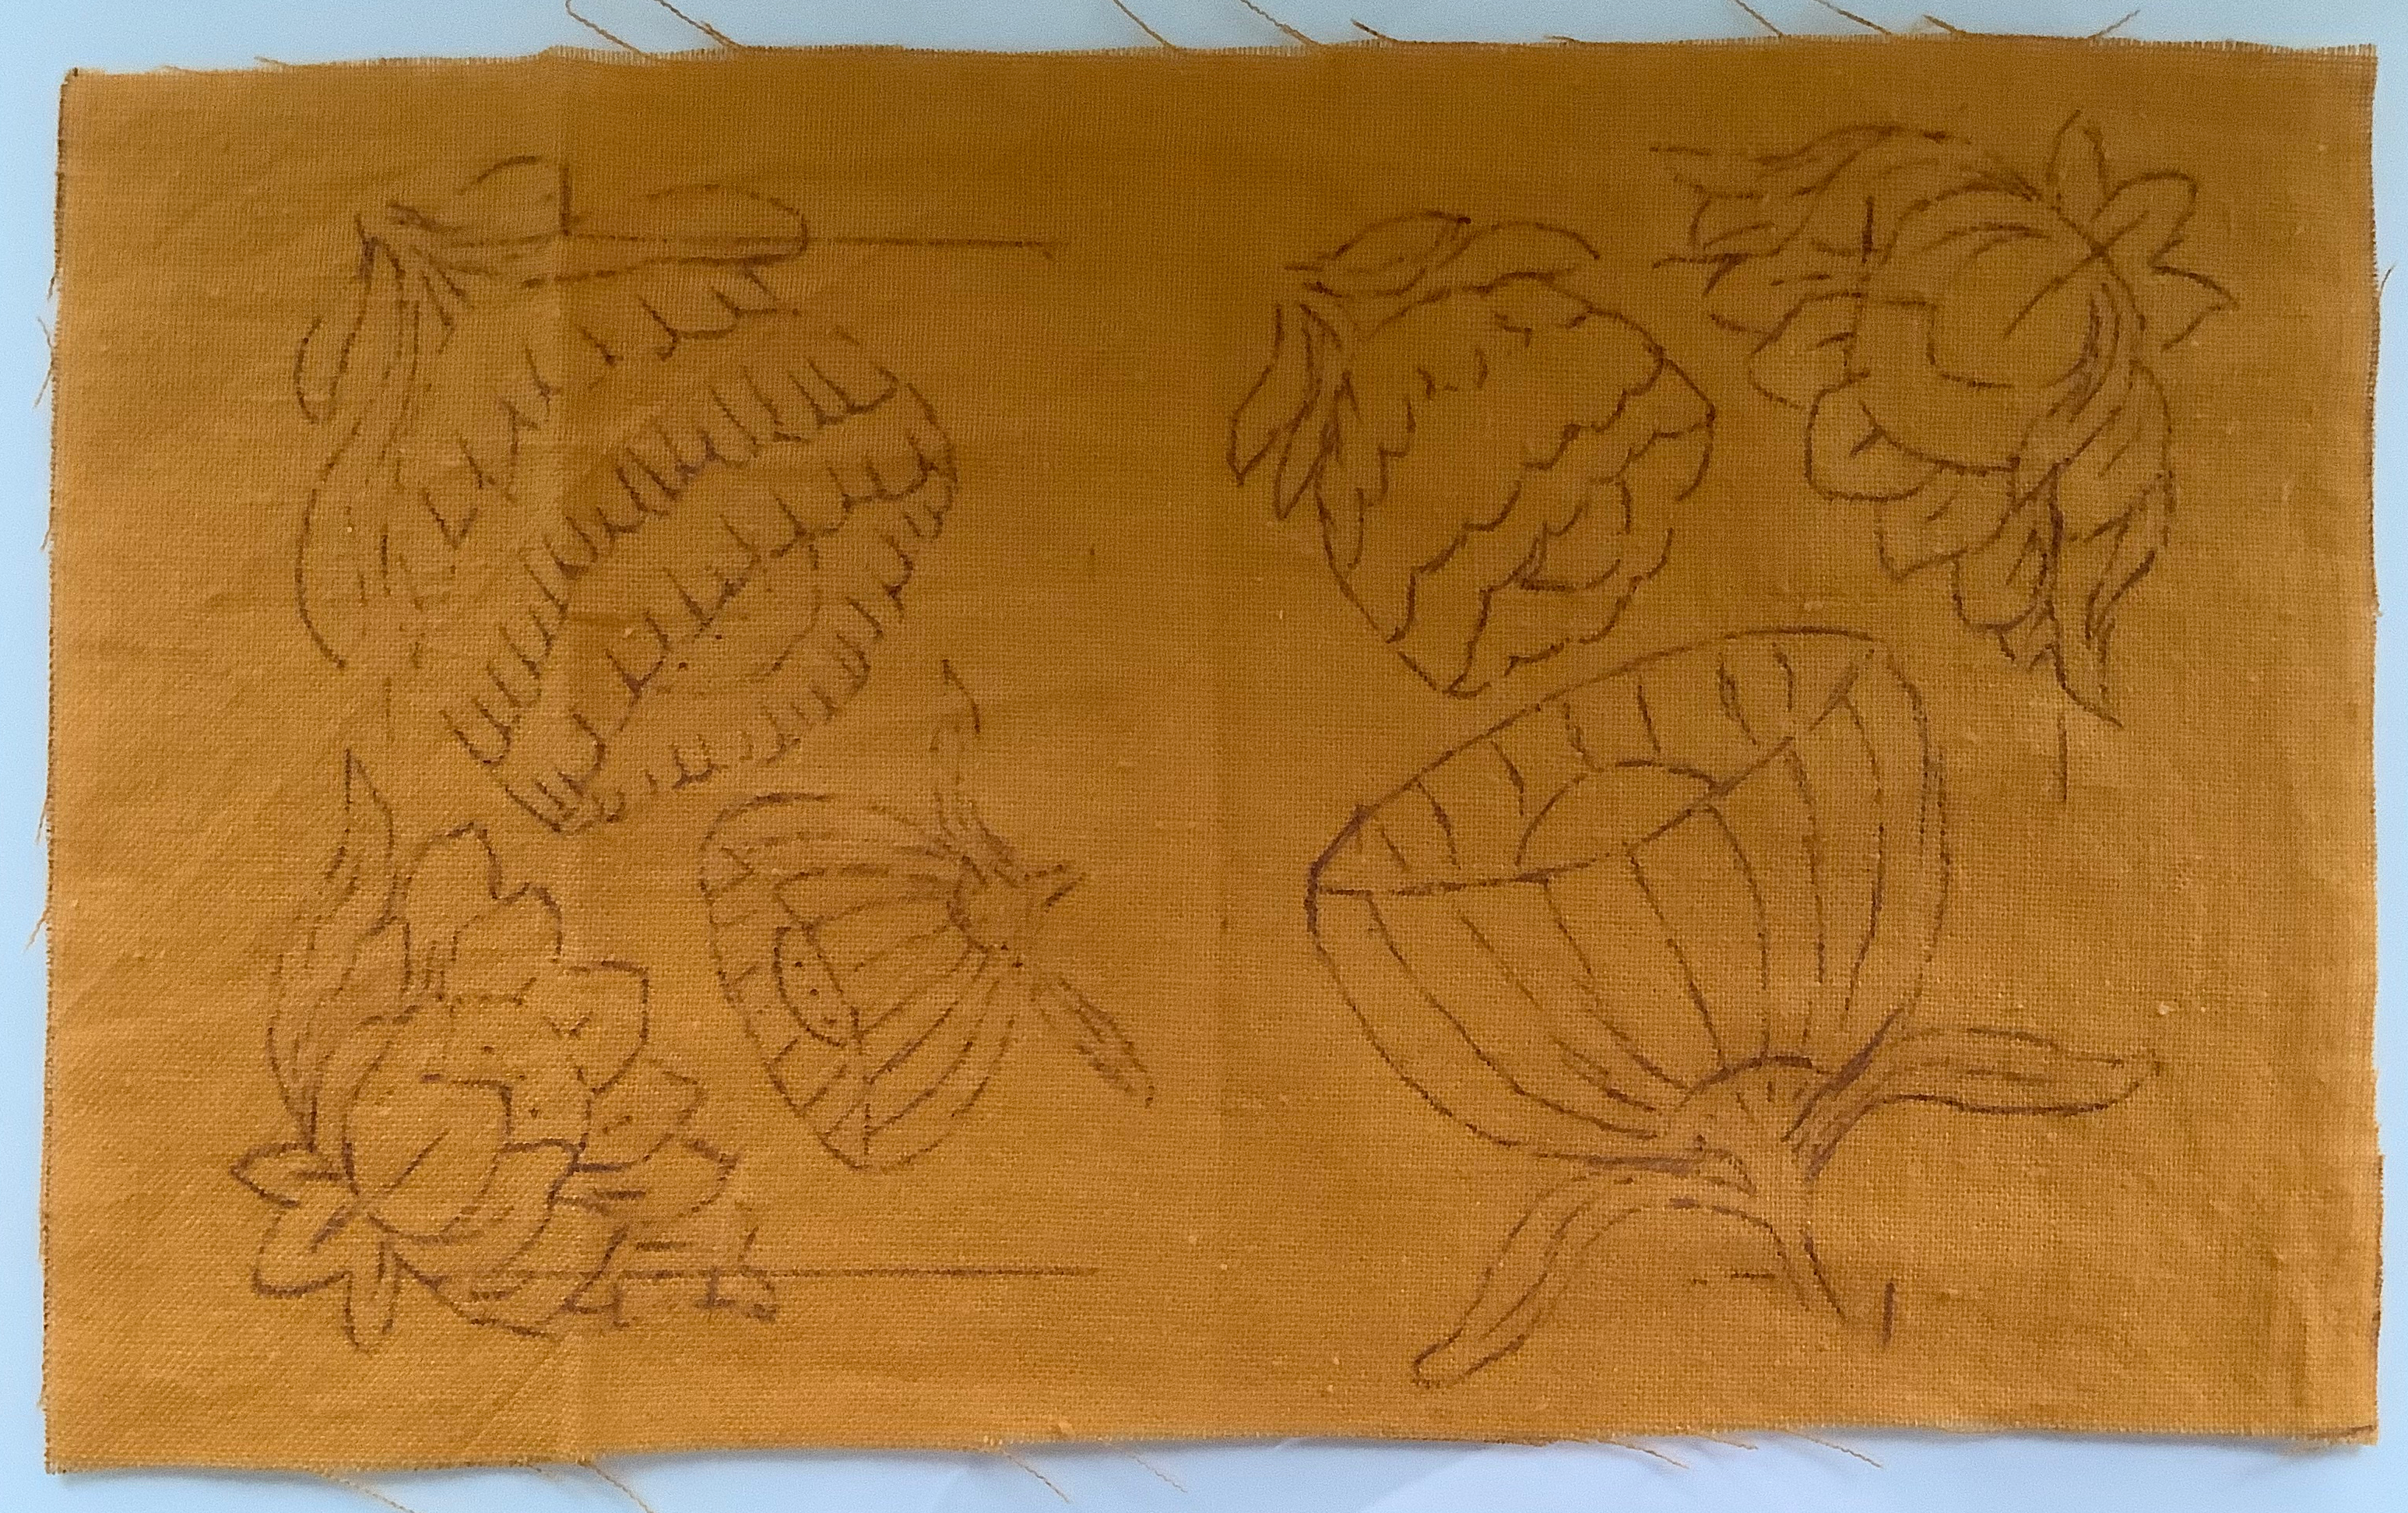
6. To do this, I set up my light table, placing the printed flower design on it and positioning the napkin over the print. I used painted stones from my nephew Ludovico to hold the napkin in place, preventing it from shifting as I traced the design with a Pilot FriXion pen. This pen is a wonderful tool available in many colors, allowing you to draw and then erase the lines with heat.
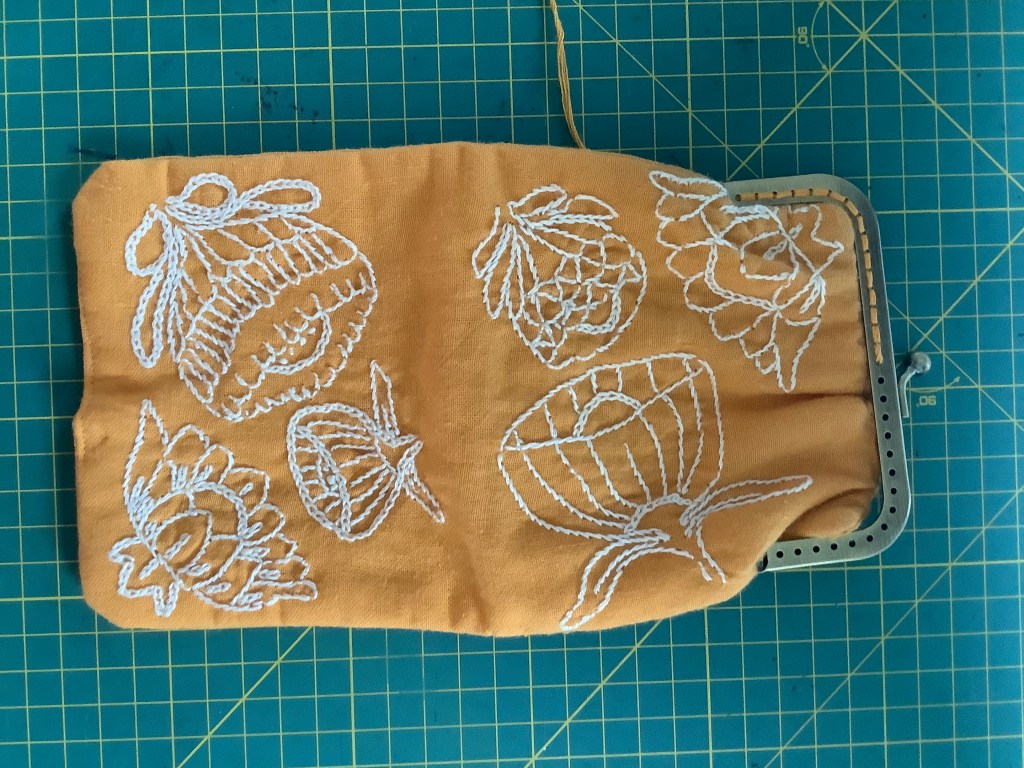
9. I sewed the front and back of the work with the usual system of leaving a few centimeters on one side of the opening, turning the work over and then closing with a small stitch the hole in which I turned the fabric. I got a sewn rectangle consisting of 2 parts. I folded in two and started to insert the Clic Clack clasp on the top of the clasp.
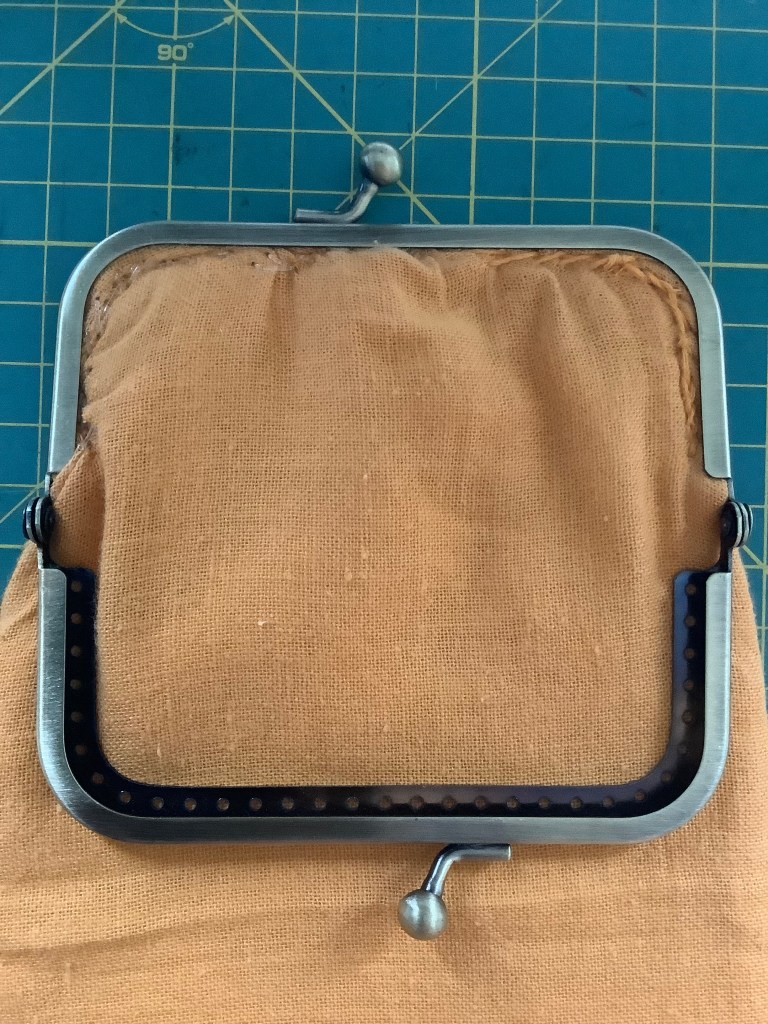
11. Then I sewed the two halves by hand, leaving about 1 cm between the seam and the Click Clack zipper so that I could open the bag with a minimum of ease. I entered the second part of the wallet in the second Clack click and repeated.
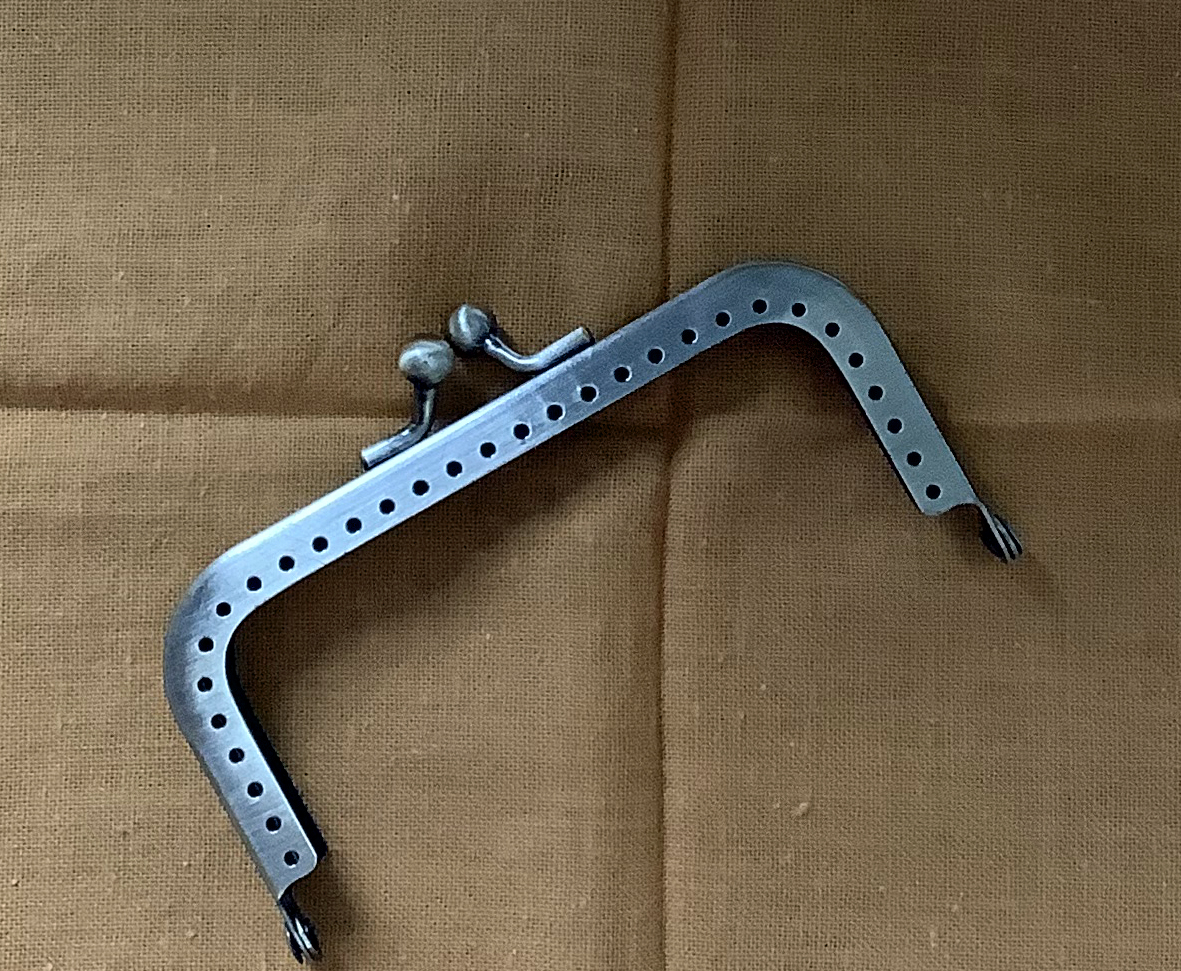
4. I began thinking about other items I could create with my embroidered napkins. The first idea that came to mind was a purse. Of course. I had made many zipped pouches, often adorned with a blooming skull with flowers. However, I wanted to try something different this time: a purse with a Click Clack clasp, a style popular in Asia. I’ve admired this style in Yumiko Higuchi‘s books but hadn’t tried it myself. At a trade fair, I purchased a Click Clack clasp with holes, unlike the ones Yumiko uses.
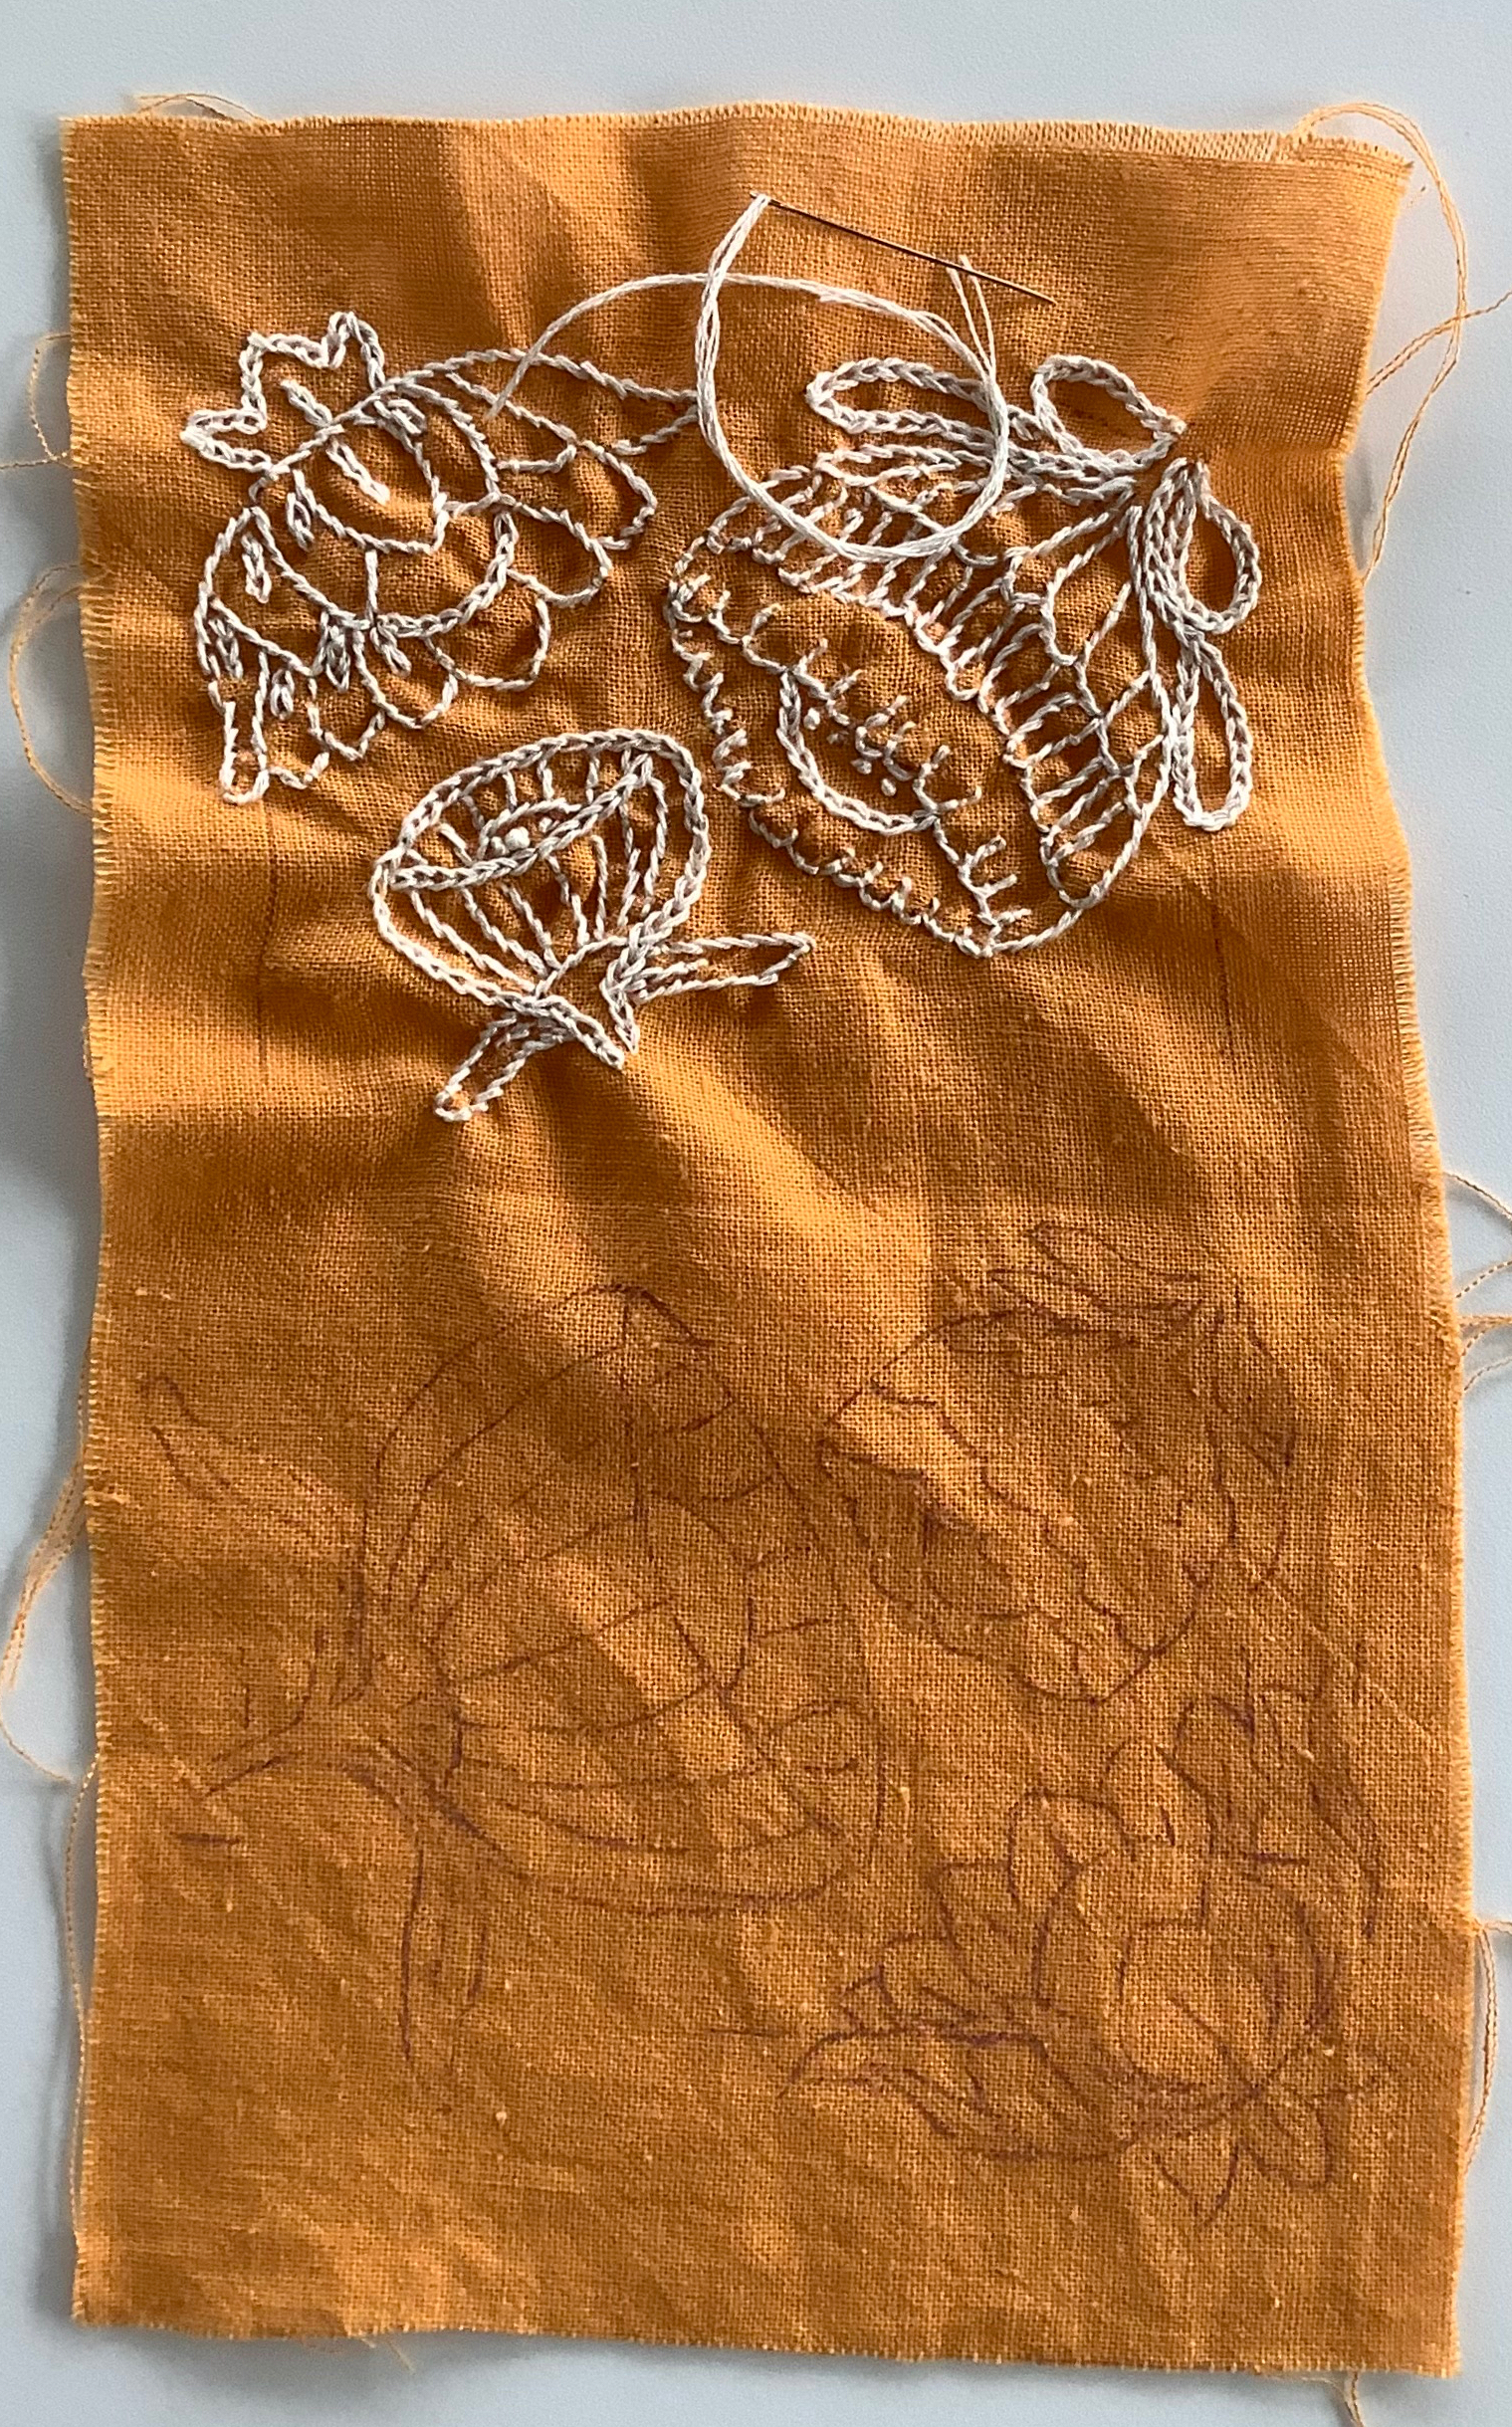
7. For this project, I chose to embroider using a single cream color. I used six-ply DMC embroidery cotton, separating it into three strands to achieve the desired thickness.
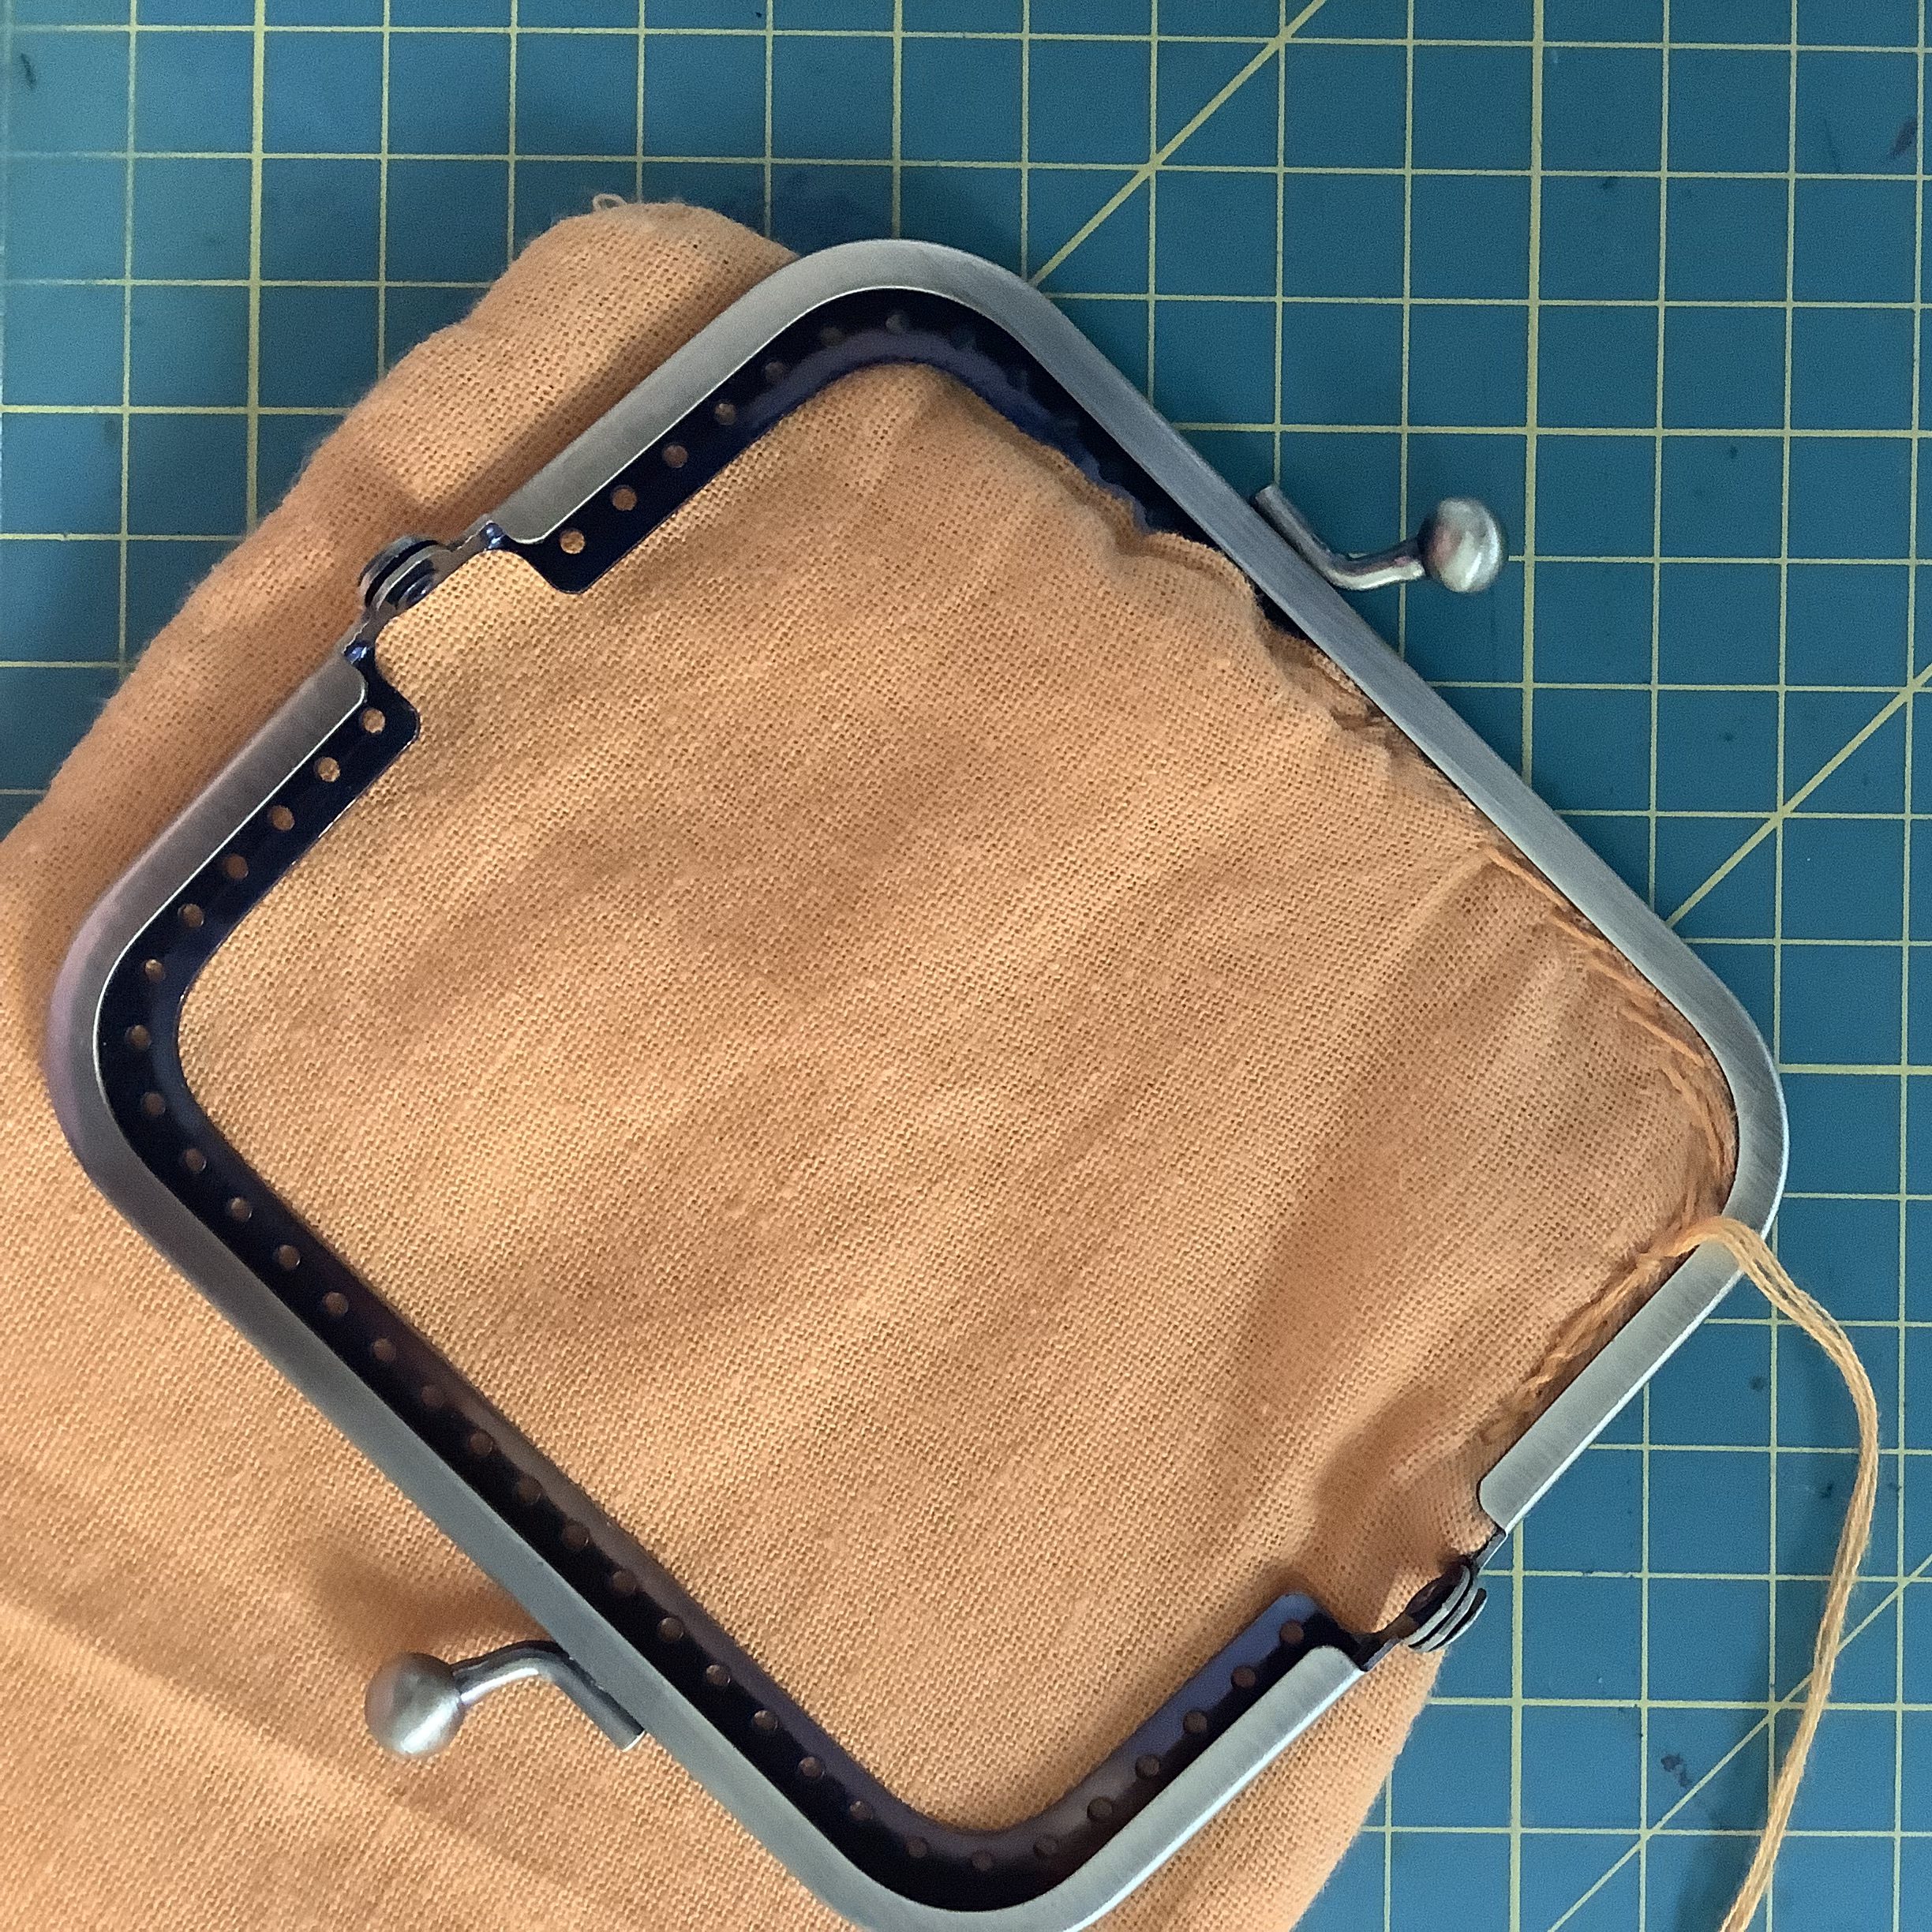
10. I inserted the needle with a thread of the same color as the napkin in the middle and with two strands of DMC thread I sewed in and out of the holes of the Clic Clack clasp from the inner half to the outside, trying to keep the seam invisible even on the inside (not so well, I admit). I sewed with this technique until I had inserted the whole first part of the pouch inside the first half of the Click Clack.

12. After securing the first part, I repeated the process with the second half of the napkin, ensuring both sides of the clasp were neatly attached.
